Saturday, February 18, 2012

School Days Picture Frames

5 years ago, my 10 yr. old step-daughter had her picture day at school and she wore the most adorable dress.  I saved that dress in hopes that one day when I had my own little girl that she would wear the same!  That day arrived and I now have the most adorable pictures of two of my girls in matching dresses at the same stage of their lives!  So, I searched for the perfect picture frames to make this special and could not find one within my "budget" I was allowing myself.  I found some unfinished frames at my local craft store on sale and was able to finish these frames for around $6.


Painting the frames, and using my Cricut for lettering and the pencil added just the touch I was looking for!

DIY Fort Kit

I am now officially addicted to Pinterest.  I can't help myself, and when I saw this really cute DIY Fort Kit, I just knew I had to make one for my Isabelle.  This was so easy, and I had most of the stuff already in my house. 


Contents included:

2 - Flat Sheets with ribbon loops sewn onto the corner's and middle
Bungee Cords
Clothes Pins
Flashlight
Glowsticks
Chip Clips
Twine
Pillowcase for storage

For the flat sheets, I simply looped the ribbon and sewn them into place.  You can utilize the twine, chip clips, clothes pins and bungee cords to hang your forts up how you desire! 


These make great gifts and I made mine for around $5!!

Boutique Bow Tutorial

Who really wants to spend $5 or more on something you can make for a 1/3 of that at home?  Not me!  I love all of these great tutorial's on the Internet explaining how to make Boutique Bows and I thought I would share one with all my friends. 

Here is a great one brought to you courtesy of Notes from the Patch.  This is a really different way to make the classic Boutique Bow but seems easier than some I have tried in the past!  If you try this method, post your finished products on my Facebook page!

Thursday, February 16, 2012

Book Review: Reader's Digest Homemade

So, here recently I have been making regular trips to the library again looking for some inspiration on some different projects.  So, that being said I am going to start inserting little "book review's" into my blog entries as I go along.

So here is my first one...  I picked up this book at the library, and actually thought that a lot of the DIY ideas in it for things such as making your own ketchup, bisquick mix, and so forth were great alternatives to the store bought items.  As I create them myself I will post those online and give my opinion!  However, if you are interested in purchasing this book yourself you can find it at Amazon.com here!

Tuesday, February 7, 2012

Homemade French Fries

As those that know me, I have quite the obsession with cooking simply and deliciously!  One of my ALL time favorite blogs to frequently check for recipes and The Pioneer Woman and I also religiously watch (well, actually DVR) her show every Saturday at 10am on the Food Network!  Over the weekend I took a trip to my local Bed Bath & Beyond and purchased a "Fry Cutter" for around $15.  I tell you what... this was probably the best $15 I have spent in a long time because my fries I made tonight were superbly scrumptious.

For the full recipe please visit The Pioneer Woman here for this great dish!

Valentine's Day Love Bug!

So with Valentine's Day less than a week away I am sure you are all getting ready!  This year was my daughter Isabelle's very first Valentine's party at school and I was so excited!  I found this post on Everyday Cricut and decided to mirror this project and make these super cute valentine's!  On the post at Everyday Cricut they used different cartridges, but since I was really not interested in making a special trip for these I decided to find things similar to what they did!  The cartridges I used on these valentine's were the Birthday Bash and the Simply Charmed cartridges.  Birthday Bash carried the scalloped square and the Simply Charmed cartridge carried the "Love Bug"!  I did all the doodling by hand and added the "Love Bug" message with my printer on the computer!

Tuesday, January 31, 2012

DIY Bath Paint

So, I know all you Mom's LOVE to have toys and things for your kids to play with in the bath, and for mine, she HATES bath time.  So tonight I decided to try a new idea I found on Pinterest!  Yes, I am also addicted to Pinterest... it's probably the best thing invented since maybe sliced bread and coffee.  All you do is take regular shaving cream, a muffin tin, and food coloring!  Yes, it's that simple, and as I write this post my daughter is enjoying her new bath paints that cost me nothing to make (and that's because the shaving cream was free!).


Monday, January 30, 2012

French Toast with Berry Butter

Hello everyone!  Yesterday I tried a new French Toast recipe with my family and it was a HUGE hit!  Thanks to Pioneer Woman, she has again brought another tasty delicious recipe into our lives and has officially become a permanent resident in my little black book.  Follow the link here for the recipe on Food Network.  And as a little tip I made my Berry Butter the day before and threw it in the fridge which was a great idea on my part. Unfortunately there were no pictures taken :( of my completed masterpieces, but they were kid tested and approved!

Disney Movie Rewards Coupons

Those of you that have children, I know purchase some Disney movies... I mean who doesn't.  Well, I recently started participating in the Disney Movie Rewards and in 3 short movies and a survey have accumulated 375 points!  Starting tomorrow Disney is releasing Treasure Buddies on DVD, which we plan on purchasing as soon as possible!  DMR is offering a great $5 off coupon for Treasure Buddies DVD Combo pack or Blu Ray which you can follow the link here.  Now, you may have to sign up for the DMR club, but with all the great Member Extras why wouldn't you!

Sunday, January 29, 2012

Craftsy BOM Asterisk done!

So, I know I had previously shared the link on my Facebook page about Craftsy offering a year long free class on quilting.  Each month you complete two new styles of 12 1/2" quilt blocks, and at the end of the year you will have enough to make a Twin size quilt!  I know... cool right?  Well, as always I struggled with a fabric selection and then remembered about a year ago I purchased Ian Falconer's Olivia material to complete a quilt for my then 3 yr. old Isabelle who LOVED Olivia.  So I purchased a stark white background material and today I decided to get to cutting and sewing!  I have added the link here to follow to Craftsy so you can start your own Block of the Month!

Please feel free to share your designs with me on my Facebook page, I would love to see your beautiful blocks as you are completing them!


Saturday, January 28, 2012

Chicago Chipboard Album!

Last summer as a family we vacationed in Chicago, Illinois.  It was a wonderful trip and we got some decent pictures that I was able to take with my phone... because like an idiot, I left my camera at home!

I always struggle how I am going to depict our trip in our family scrapbook album and decided to make a chipboard album just for this particular trip.  I really enjoyed completing this little project and it took almost an entire afternoon to finish. 

I had received the blank chipboard album as part of a gift while attending one of the many local crops in my area, however you can purchase these for less than $5.  The thing I love about these albums is that it allows you to focus on a smaller area and they can sometimes be a lot less overwhelming than making a large 12 x 12 scrapbook.  This is a great beginner scrap booking project for that very reason!

I had previously purchased some "Chicago" themed stickers and paper which I also tried to incorporate into the album as well.


Many of these chipboard albums have spines that cover the front which allow for a little extra pizazz!


Many of the craft stores now carry the Amercian Girl scrapbook line which I have added here.  The letter's were made with the Cricut "Lyrical Letter's" cartridge and the flowers were created using the "George" cartridge.  I added the rhinestone emblishment and doodled around the edges, and for added dimension I bent up the edges of the flowers.


And on the last page, I struggled because I still had not used the 12 x 12 scrapbook paper I had previously purchased, so I cut out the sign on one of the pages and added it to the back page!

Follow me on Facebook and post your own albums, I would love to see your finished product!


Monday, January 16, 2012

Groupon deal 1/16/2012

Hey everyone!  Today's Columbus area Groupon is great.  You get $20 worth of Kingy's Pub food for $10!  I snatched mine up... follow this link and get yours!

Groupon

Wednesday, January 4, 2012

My very first crochet project... COMPLETE!

So, as I had shown in an earlier post that I have recently learned how to knit.  However, although I love knitting (especially dish cloth's because they are the best!), I have also wanted to learn how to crochet.  So, my 10 year old taught me how to single and double crochet over the weekend and within 1 day I finished a small scarf for my 4 year old Isabelle.
My beautiful little model!


Even though I did not add any tassel's or anything fancy like that I think it's still a cute simple scarf.  As I finish more projects I will post pictures and even where I have found the patterns.  This particular scarf I did not have a pattern for and I just made it as wide as I thought a toddler scarf would be!  FUN STUFF!  

P.S. I have also been diligently working on my up-cycled braided rug made from old bed sheets... I will post pictures and the site for directions when I complete that project as well!

Tuesday, December 20, 2011

Christmas cards!

So, as part of the season, everyone either buys or makes Christmas cards to send to family and loved ones.  Unfortunately, I was not one of them this year.  Don't ask why... but it just didn't happen.  However, I did make some cards to put gift cards in and to prep for next years Christmas card giveaways!

This year, I found some great ideas online and thought I would share some of the ones that I tried using my trusty Cricut!


This card has flocking instead of glitter.  It gives a nice fuzzy effect.

These cards I made using the card feature on my Winter Woodland cartridge.  If you have that cartridge it has a lot of great cards that you can easily make.  And I then added the glitter and flocking with packing tape on the reverse side of the cards!


This tag I created a Archiver's during one of their make and take weekends (which are tons of fun by the way!).  You can find the directions on how to make the tag here.  I added green and pearl gel pens on the candy's instead of red.  I thought it added a nice touch!
This is also another card I created using my Cricut Birthday Bash cartridge.  This cartridge is great because it has pre-holed banner triangles and several cards that you can make including some really cute birthday die-cuts!

Friday, December 2, 2011

Homemade Scrubs

As it is Christmas, and a Season for giving, I have decided to put together some really easy and affordable gifts that you can give to some of the special people in your children's lives.  This year was my daughter Isabelle's first year of school, which meant I needed to find a gift for her teacher.  I chose to try out my ability to make a homemade scrub.  I tried several but the one I liked the best was a Peppermint Sugar Scrub that I named "Candy Cane Scrub" in spirit of the season.  This project was inexpensive, but had a really great turnout and was so simple anyone can do.  I chose a jar that had a latch closure as I thought this would keep the scrub the freshest and intact within the jar.
These are the supplies that I used to create all of the scrubs that I attempted (minus the Starbucks... that one was for me)

Here is the recipe that I used for the Candy Cane Scrub:

4 tablespoons and 2 teaspoons of Granulated Sugar
2 teaspoons of Olive Oil
1 teaspoon of Flax Oil
3-5 drops of Peppermint Oil

Now, I used all Olive Oil and did not use the Flax Oil, but you can add any mixture of oils that you would like in addition to the Olive Oil.  

Here is my finished product!

I used my trusty Cricut to make a cute label for my jar and a ribbon and you have a cute affordable gift for anyone!  This particular jar of scrub cost me about $2.80 and $1.99 of that was the cost of my jar!  Thanks Tip Junkie!

Friday, November 25, 2011

Christmas Crafts!

Today is "Black Friday" and yes, I did participate in the madness.  However, I participated at 6am instead of Midnight like the rest of the crazies!  That being said I was able to squeeze in a couple of projects that I needed to complete as part of my holiday decorating.

First I completed decorating my $5 fresh balsam fir wreath that I purchased at Home Depot today.  A while ago at a craft show I bought an adorable large wooden candy cane that I thought would be perfect on a wreath.  And I also added some old bows that I have had literally forever, some LED lights and **POOF** I have an adorable wreath for all to enjoy!


Secondly I made a fabric shower curtain from some material I bought at 60% off at Jo-Ann's and some $1 ribbon.  It adds a really nice touch to my drab bathroom (which is in desperate need of an over-haul).


This shower curtain was super easy, with 4 yards of material and 1 spool of grosgrain ribbon.  All seams are measured at 1" and depending on how wide your shower is that would be the measurements for your ribbon placement.  Happy Holiday's everyone!

Monday, November 21, 2011

What old is new...

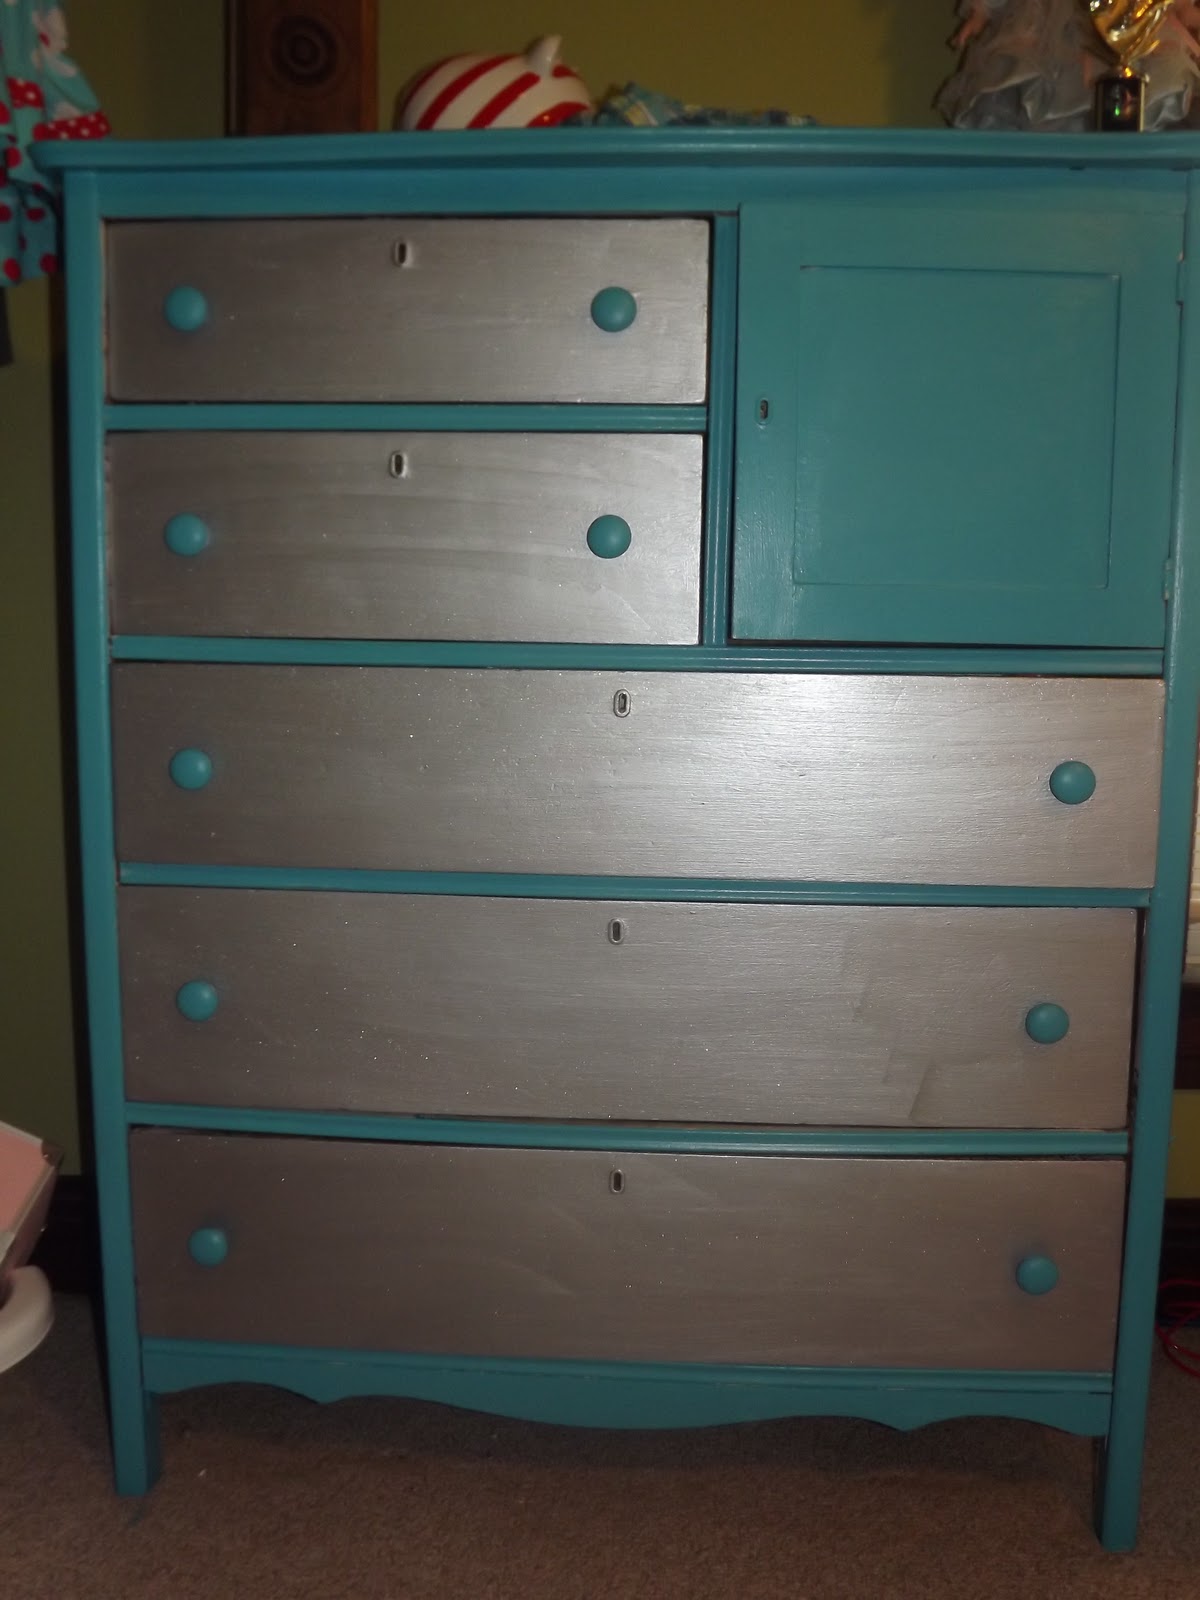
So, I know I haven't posted in FOREVER!  And I do apologize, but I have been busy with school, dance, and getting ready for the holidays!  But I did squeeze in a little time yesterday to finish a little project with my 10 yr. old.  Having three girls I am always interested in doing things a little different and since I was recently handed down a dresser from my Aunt I thought it would be a great opprotunity to give it a face-lift.  And since I was giving that dresser a face-lift I thought, why not give the other dresser a face-lift as well!  Here is what the two dresser's looked like before...
This was the hand-me-down dresser from my Aunt.  Still in good condition but desperately needed paint and new knobs.


This is an old dresser that was mine when I was a kid, and was in desperate need of a face-lift.

So yesterday on our trek to Home Depot, we picked up some Turquoise (Disney), Metallic Silver, and Silver glitter paint (both from Martha Stewart).  After a lot of hard work, new knobs, and several coats of paint, they girls both had brand new dressers!  The glitter paint had a really cool effect, but was hard to capture on camera.
This is the "new" hand me down dresser!  I think it turned out great!


I tried to get a close up to capture the glitter paint, but the picture does not do it justice.

Wednesday, October 12, 2011

Homemade Turkey & Noodles

So, last week I made my very first attempt at cooking a turkey.  It actually turned out great, and seeing as I bought the turkey around Christmas last year for less than $5 it has made a great meat for lunches!  Talking to my husband last night, he proclaimed he is tired of eating turkey sandwiches and asked if I would make turkey and noodles for dinner tonight.  Keeping in mind that I have NEVER made homemade noodles and really don't have any luck cooking them, this should be interesting!  Looking online I found a great Chicken and Noodles recipe at The Pioneer Woman.  She has a great website with full tutorials and recipes on how to make things and has really great ideas on home interior and general everyday life!

Here is the pictures of my final noodles, I probably should have cooked them a little longer but I thought they were delicious!

Tuesday, October 4, 2011

JELL-O Halloween Brain Mold

For this Halloween season JELL-O is offering a FREE Brain Mold for $2.95 shipped!  Get yours while supplies last because they are going fast.  These are great for a fun after school snack, halloween party, or just to creep out your kids!  Follow the link here and will take you directly there.

Monday, October 3, 2011

Halloween Wreath

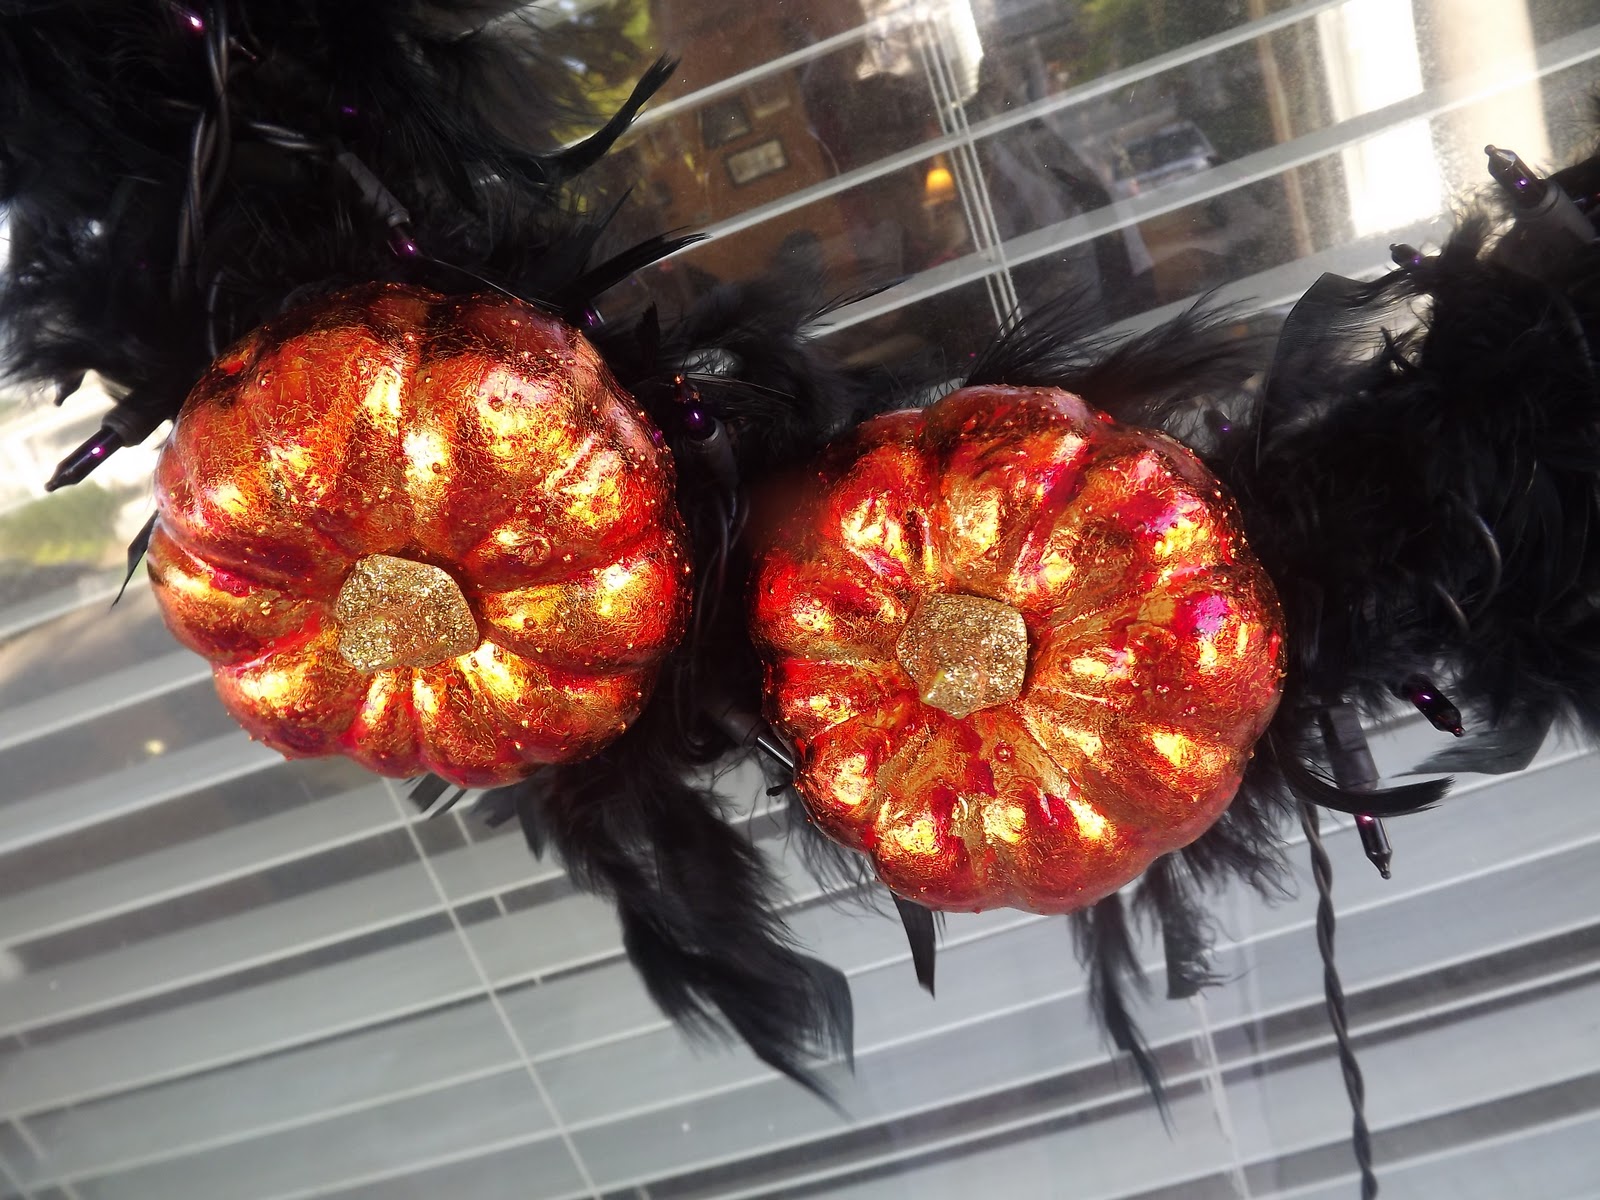
So, I know some of you have seen those wreath's that are made of feathers.  And I refuse to pay $25 for one even though they are extremely cute.  I decided to make my own concoction of one and I think it turned out really well.  I might still add a bow to it, but I have yet to find some ribbon that I feel is worthy!  I did also add some purple Halloween lights to add some spookiness!